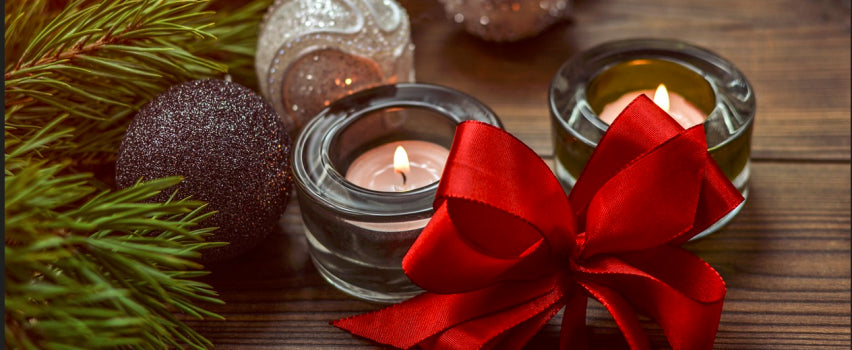
The creation of DIY candles It can be a fun and creative project, and it can be a very special gift for any occasion. You can create handmade candles in wax or gel or in other variants. Follow our steps to learn how to do it DIY candles with various techniques.
Necessary basic materials
To do DIY candles, you will need some essential materials. This includes a container for wax, solid wax or paraffin, pre-cerata wick, a saucepan or heat-resistant tank to dissolve the wax, dyes (for the gel version), fragrances and tools to cut the wicks. You can buy all these materials at local or online crafts shops.
The first thing to do is carefully measure the amount of wax needed. To do this, you must first determine the depth and diameter of your tray. Then you can measure its volume using the appropriate formulas. The total volume of the wax should be about 0.75 times the volume of your tray. It doesn't matter if it is gel or wax version; The main idea is the one we have just described!
Fusion of wax
Bees wax is an excellent option because it is easy to use and convenient. It melts easily at high temperatures and provides a good finish with candles that cannot be reached with other materials. However, paraffin wax can be toxic and emit annoying smells during combustion.
Once you have grouped all the necessary materials, it's time to merge the wax! Always make sure you work with safety. Use heat -resistant kitchen gloves and avoids the direct use of the fire: it opts rather for a water kettle followed by a smaller container hanging on the kettle in order to merge the wax gradually without risk. A popular method is that of "moccolo candle": simply take a few pieces of your melted wax and pour it into your container (do not fill it up to the brim!) And let it solidify before adding other material such as the fragrance and/or the color. Once you have filled your container with the desired quantity of liquid wax, insert the wick into the mixture liquidated still warm before it completely solidifies.
Once you have correctly measured the necessary amount of wax, proceed with the dissolution of the same in your saucepan or heat -resistant tub over low heat. While melt the paraffin or solid wax in boiling water, add dyes and fragrances according to your personal tastes. Once everything has been mixed well and has become fluid and homogeneous as a dense liquid similar to skim milk, turn off the fire and pour it gently into the previously prepared tray. Then insert the pre-cerated wicks into the tray with the liquefied wax (always ensuring that they do not touch the bottom) leaving the free end out of the tray itself. Leave to cool completely before extracting the candles from the tray using a sharp knife as a support to remove them easily without breaking them!
Candle gel production
Gel is another good option for those who want to do DIY candles. The gel allows people to create unusual and colorful shapes that would not be possible with beeswax. In addition, the gel burns more slowly than beeswax and produces less smoke during combustion. However, the gel can be more difficult to work than the beeswax and it is also more expensive.
Once the basis of your candles is decided, you have to decide how to decorate them. There are numerous alternatives to choose from here; You can use the metal stem to support the decorations on the surface of the candle or add some natural fragrances such as essential oils to further customize it. You can also paint it with food dyes or add dry or glitter petals to create an elegant and sophisticated appearance to yours DIY candles!
If you decide to produce your gel candles, you have to prepare them before the fusion of the gel. To produce the Maccone of your Candle Gel you should use preformed rectangular blocks; If you do not already have this format, we can easily derive from it by cutting the circular ones that are found in most specialized stores or online stores specialized in decorative lighting. Once the desired dimensions are cut, we will apply the wick in the center of the stump; The latter will consist of a central thread and two side threads maintained firmly thanks to special plastic staples supplied in most kits that can be purchased online as well as in the stores traditionally dedicated to this hobby.
After completing insertion, we should proceed with the definitive assembly by mixing equally vaseline + vegetable oil + vegan glycerin + fragrance + dye. We mix carefully and pour into the mold, finally we wait for it to represent. Obviously the mold must be perfectly clean before use to avoid any possible deposit of foreign residues on the candle!
Conclusion
If you are a fan of DIY, then you know how fun it can be to create something with your hands. The creation of homemade candles is a fun and relaxing activity that can also lead to beautiful results. In this article, we will provide a detailed tutorial on how to make DIY candles in gel or wax.
Make their own DIY candles It can be fun and extremely rewarding! The key is to find the right combination of materials and accessories to create something that reflects your individual preferences in terms of design and fragrance. Experience with different combinations until you find the perfect one! You will discover that by dedicating time to create them it will make you very proud of your final product!
With the help of our easy to follow instructions - both for gel and wax version - now you can make beautiful handmade candles! Creating something with your little hands can be rewarding and extremely fun; Try it now!
Good fun!


